April 24, 2025
Hardwood flooring continues to be one of the most popular, and timeless, flooring options available to homeowners, regardless of personal preferences in other aspects of home decor. Stylish and versatile, solid hardwood flooring is easy to clean, repair, and maintain through its lifespan. In addition, hardwoods are naturally durable and can typically withstand everyday wear and tear.
Looking to install hardwoods on your own? It sounds harder than it actually is. Continue reading for a simple outline of steps and tips to follow along the way of your hardwood floor installation.
Before diving in too quickly, take time to prep your space for the hardwood floor installation. The more time you spend prepping, the less time you’ll spend on cleaning up and repairing damage. Trust us, preparation and surface protection are crucial during any home improvement-related construction or remodeling job.
First, clear the area where you’ll be installing your new floors. Carefully move all furniture, personal items and decor into another room. If your belongings are in an open area and still exposed to the area you’ll be working in, cover these items with a drop cloth. Next, build a dust containment system.
Once your dust containment system is in place and sealed off, be sure to cover any other exposed surfaces to prevent dust damage. In addition, seal off your HVAC ducts with protective film to keep the dust from circulating in your space.
Once your space is prepped, take time to measure your flooring area to determine square footage and how much new flooring you’ll need. In addition, explore the different types of installation techniques, and choose one that suits your needs.
If you are renovating a space, the next step is to remove the current old flooring, baseboards, trim, shoe molding and doors. This will ensure that the wood flooring planks can be installed as closely to the walls as possible, creating a seamless look.
If you have chosen to use the click and lock installation method you may not need to remove your existing flooring! Planks can be installed above plywood subfloors, ceramic tiles, laminate flooring, concrete and linoleum materials. Just make sure your surfaces are completely level prior to installation.
Preparing the subfloor is a critical step, especially for the glue down or nail down methods. Sand down the surface to remove any materials. Vacuum up the remnants, and then dispose of them. If there are any squeaky spots, securely screw the subfloor into the floor joists.
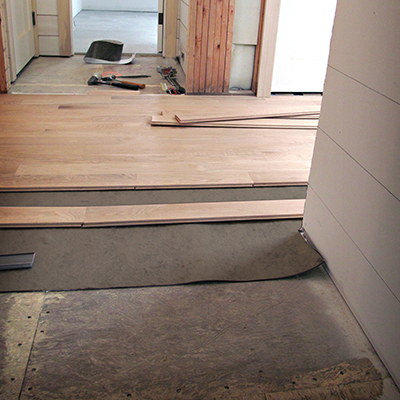
Once your surface is sanded and level, install a vapor barrier. Red rosin paper, foam and felt are great economical options. If you are looking to reduce noise, explore a noise barrier underlayment.
Finally, it’s time to lay your hardwoods! This step will differ based on your hardwood floor installation method. When installing, it’s best to begin the first row with a long piece of hardwood. Align the board with the drywall, and secure it into place. Installing the next row of boards will depend on which installation method you have chosen. When in doubt, call a professional to help!
After you’ve invested in hardwood flooring and hardwood floor installation, take care of your floors to increase their lifespan! Below are just a few tips to keep your hardwoods looking new.
Preparing for and then performing a wood floor installation isn’t just something for professionals floor installers. Follow these tips and you and your family will be able to enjoy the warmth, durability and beauty of solid hardwood flooring for decades.


Get Social
3 days ago
Video
Share on Facebook Share on Twitter Share on LinkedIn Share by Email
7 days ago
Video
Share on Facebook Share on Twitter Share on LinkedIn Share by Email
1 week ago
Video
Share on Facebook Share on Twitter Share on LinkedIn Share by Email
2 weeks ago
Video
Share on Facebook Share on Twitter Share on LinkedIn Share by Email
2 weeks ago
Video
Share on Facebook Share on Twitter Share on LinkedIn Share by Email
Cling Cover is premium plastic sheeting clings to almost any surface, attracting overspray and keeping your workspace clean, bright, and protected.
2#trimaco #totaljobsiteprotection #savetimesavemoney #work #paint #painting #construction #constructionproducts #build #buildzoom
Prepping for renovation with Easy Mask Tape & Drape 🚨🚨
@refreshhomeimprovements
#trimaco #totaljobsiteprotection #savetimesavemoney #work #paint #painting #construction #constructionproducts #build #buildzoom #building #homebuild
Refresh your kitchen on a budget with an easy DIY backsplash ✨
4Check out our latest blog for a step by step guide: https://trimaco.com/blog/how-to-diy-a-kitchen-backsplash/
#trimaco #totaljobsiteprotection #savetimesavemoney #work #paint #painting #construction #constructionproducts #build #buildzoom
Highly absorbent and reusable, Trimaco’s Wonder Rag is your go-to for a spotless finish
2#trimaco #totaljobsiteprotection #savetimesavemoney #work #paint #painting #construction #constructionproducts #build #buildzoom #building #homebuild