January 9, 2019
DIY with Trimaco (Tri DIY with us!)
The New Year Slump: it’s that time of year that the holidays are over, families return home, decorations come down and the countdown to spring is on. But why do the fun decorations have to stop just because the calendar says so? Keep the spirit going by creating your own decorations for the new year. These simple and easy canvas dropcloth signs are the perfect decorative addition to keep that slump away!
Materials needed:
Directions:

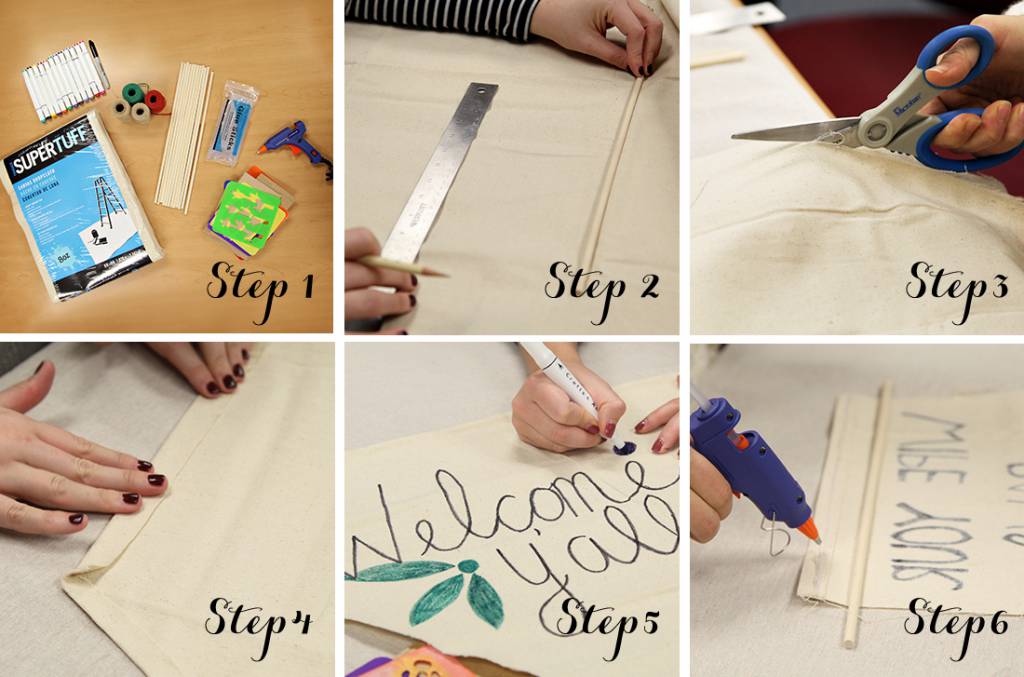
- First, gather your materials and heat up the hot glue gun.
- Measure out and sketch your desired shape for your sign on the Trimaco Supertuff Canvas Dropcloth. In our designs, we measured the top of the banner to be roughly 12”-20” wide.
- Using the scissors, cut the Canvas Dropcloth along the sketched shape of your sign – but add 1″ to the edges.
- With the hot glue gun and the extra space along the sign, glue and fold over the edges to create a hem – repeat along all edges, except for the top.
- Sketch your design onto your sign with a welcoming note, or a favorite saying. We first used a pencil, and then retraced the design with fabric markers.
- Once your design is complete, turn the canvas over. Place the wooden rod at the top of your sign/design and glue into place. Fold over the remaining canvas and glue down to secure the rod to the sign.
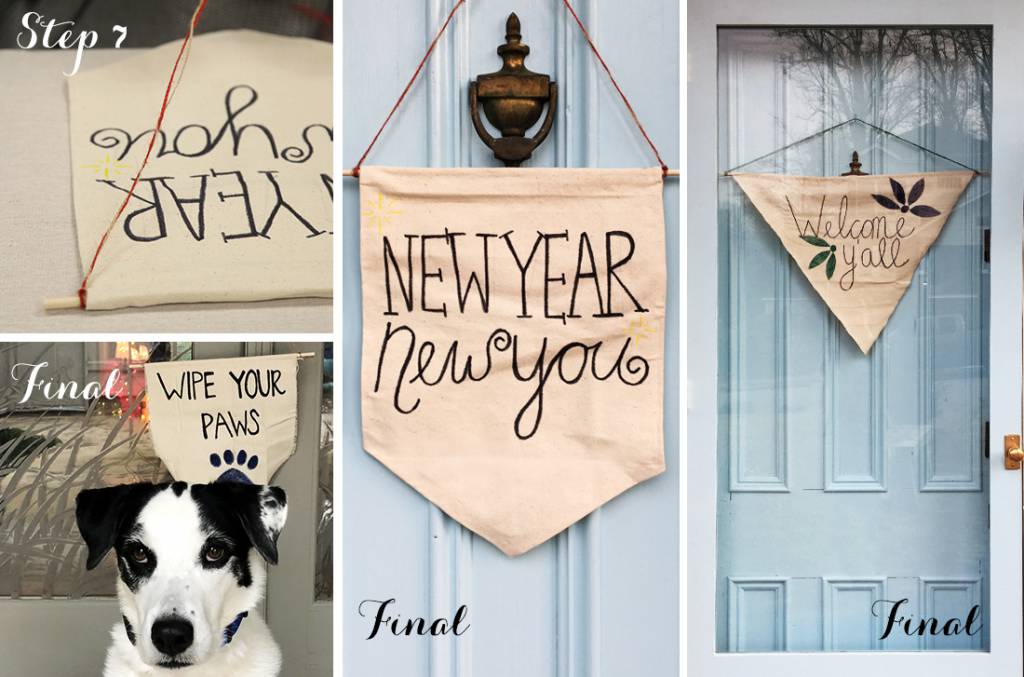
- Cut the twine to your desired hanging length, tie and secure to both sides of the wooden rod.
- Hang your canvas dropcloth sign and keep the new year slump away!

Tricks we learned along the way
- Put down another dropcloth first, so the fabric markers do not bleed through onto the table.
- Wash and iron your dropcloth before cutting and designing for a clean look.
- Make sure your wooden rods extend all the way across the length of the canvas signs, but leave enough room to add the twine to hang.
Have a canvas drop cloth decoration or project of your own? Feel free to share below!


Get Social
2 days ago
Video
Share on Facebook Share on Twitter Share on Linked In Share by Email
3 days ago
Photo
Share on Facebook Share on Twitter Share on Linked In Share by Email
3 days ago
Photo
Share on Facebook Share on Twitter Share on Linked In Share by Email
4 days ago
Video
Share on Facebook Share on Twitter Share on Linked In Share by Email
4 days ago
Photo
Share on Facebook Share on Twitter Share on Linked In Share by Email
Protection matters. Tough jobs need tough protection and Floorshell is the answer @bolder_premiumprotection
#renovation #remodel #remodeling #woodworking #underconstruction #constructionzone #architecture #design #realestate #constructionsite
"Hardwood floors were fully protected using X Board and securely taped - a much safer and neater option..." - @lau_decor
#renovation #remodel #remodeling #woodworking #underconstruction #constructionzone #architecture #design #realestate #constructionsite
Tough, leakproof, and flame-retardant—Aqua Shield is the reusable surface protector built for high-traffic job sites and sensitive spaces.
2#renovation #remodel #remodeling #woodworking #underconstruction #constructionzone #architecture #design #realestate #constructionsite
X Paper, Floorshell, Stay Put..oh my!! @carlson_paint_and_paper
#renovation #remodel #remodeling #woodworking #underconstruction #constructionzone #architecture #design #realestate #constructionsite