
October 23, 2023
 There’s something charming about a breakfast nook. It’s the perfect spot to start your day, enjoy a cup of coffee, and share meals with family and friends. While you might think that creating a cozy breakfast nook requires hiring a professional, it’s actually a project you can tackle yourself with some basic tools, materials, and a little bit of creativity.
Before you start your project, it’s essential to gather all the necessary materials and tools. Here’s a list of what you’ll need:
Now that you have your materials ready, it’s time to start building your breakfast nook. Here’s a simplified step-by-step guide:
How long will it take to complete this project?
The time required depends on your skill level and what your design entails. With materials gathered, it could easily be a weekend project.
Can I customize the size of my breakfast nook to fit my space?
Absolutely! Customization is one of the benefits of any DIY project. You can create an L-shaped nook or a simple straight bench. Adjust the dimensions to fit your space and preferences.
Do I need advanced woodworking skills to build a breakfast nook?
While basic woodworking skills are helpful, this project can be done by beginners.
Creating your very own DIY breakfast nook can be a rewarding and budget-friendly project that adds warmth and functionality to your kitchen. With the right materials, tools, and a little patience, you can enjoy many mornings in this elevated eating area.
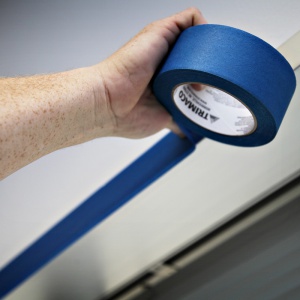
For more tips from Trimaco, visit our blog. Have more DIY projects lined up? Make sure to check out our catalog for all your jobsite protection needs, from temporary floor protection and PPE to masking paper, wiping cloths, and dust containment, Trimaco has you covered.


Get Social
1 week ago
Video
Share on Facebook Share on Twitter Share on Linked In Share by Email
2 weeks ago
Video
Share on Facebook Share on Twitter Share on Linked In Share by Email
2 weeks ago
Video
Share on Facebook Share on Twitter Share on Linked In Share by Email
3 weeks ago
Video
Share on Facebook Share on Twitter Share on Linked In Share by Email
4 weeks ago
Video
Share on Facebook Share on Twitter Share on Linked In Share by Email
Cling Cover is premium plastic sheeting clings to almost any surface, attracting overspray and keeping your workspace clean, bright, and protected.
2#trimaco #totaljobsiteprotection #savetimesavemoney #work #paint #painting #construction #constructionproducts #build #buildzoom
Prepping for renovation with Easy Mask Tape & Drape 🚨🚨
@refreshhomeimprovements
#trimaco #totaljobsiteprotection #savetimesavemoney #work #paint #painting #construction #constructionproducts #build #buildzoom #building #homebuild
Refresh your kitchen on a budget with an easy DIY backsplash ✨
4Check out our latest blog for a step by step guide: https://trimaco.com/blog/how-to-diy-a-kitchen-backsplash/
#trimaco #totaljobsiteprotection #savetimesavemoney #work #paint #painting #construction #constructionproducts #build #buildzoom
Highly absorbent and reusable, Trimaco’s Wonder Rag is your go-to for a spotless finish
2#trimaco #totaljobsiteprotection #savetimesavemoney #work #paint #painting #construction #constructionproducts #build #buildzoom #building #homebuild