October 1, 2020
As we gear up for Halloween, what better way than to create your own DIY Halloween decorations. These home-made cheesecloth ghosts are simple, yet cute additions for your home, entryway or front porch for trick-or-treaters and Halloween party guests to enjoy! Follow these easy steps, to create a spooky, cute, and life-like cheesecloth ghost:
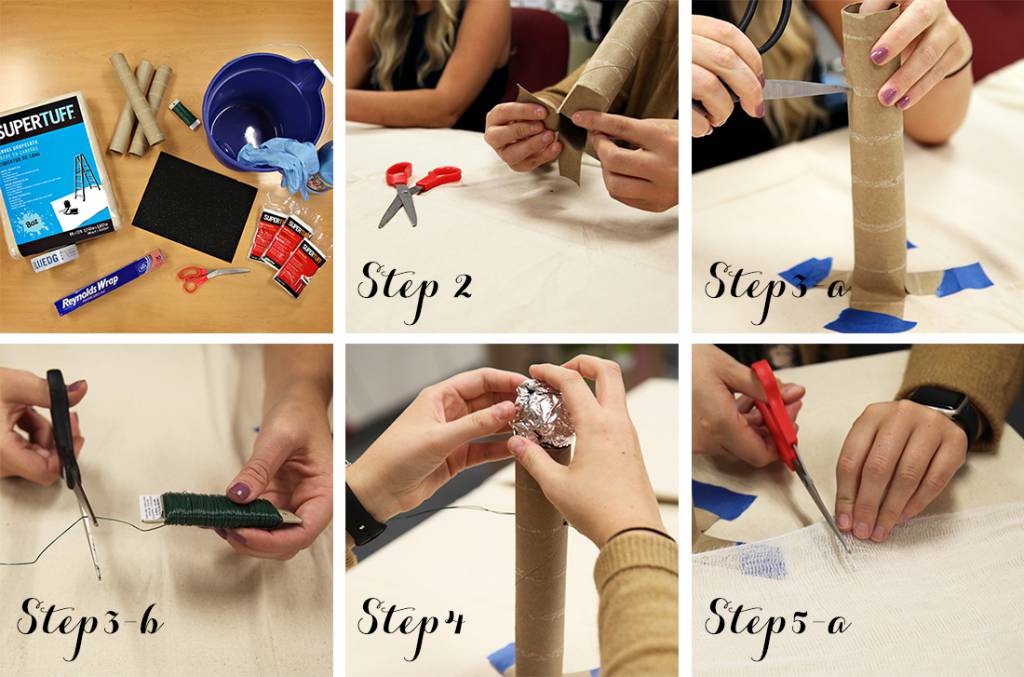
Gather your materials, and lay down a Trimaco Stay Plus Canvas Plus to contain mess, and provide an easy clean up!
Materials needed:
Note: You may want to check out our tips at the bottom of the page before starting.
Crumble up a piece of aluminum foil or styrofoam ball, and tape on top of glass bottle or cylinder.
Cut the Trimaco SuperTuff Cheesecloth into strands, long enough drape on both sides of the mold (for paper-towel sized-molds this is roughly 2 feet) *For best results drape dry cheesecloth to ensure strands are long enough!

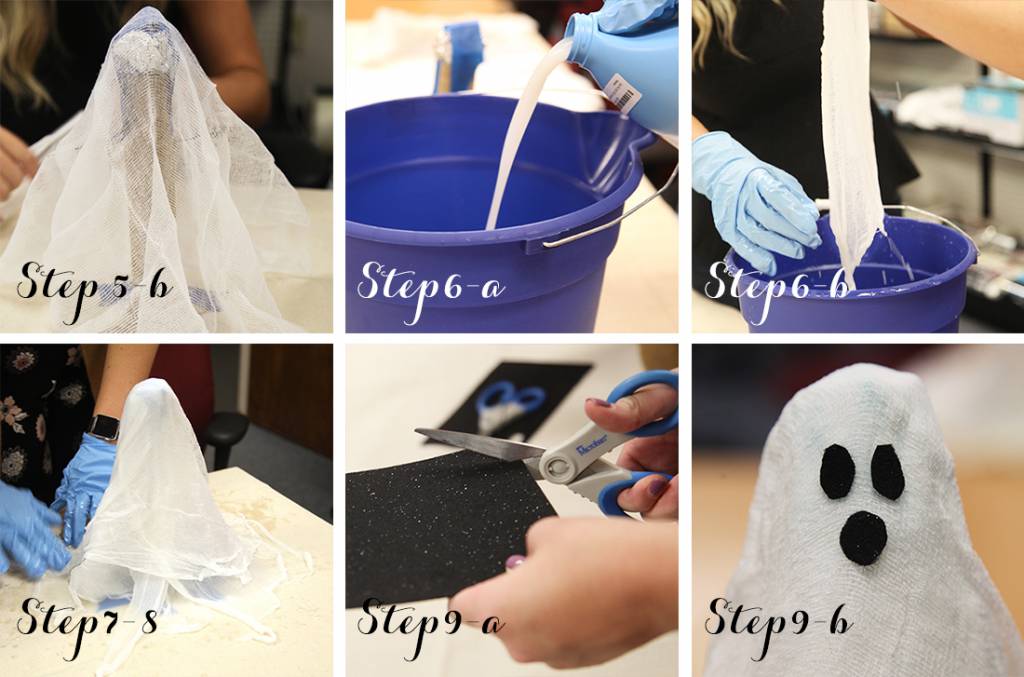
Pour the Liquid Starch into a Trimaco bucket ,and dip the cut Trimaco SuperTuff Cheesecloth into the Liquid Starch. Let excess Liquid Starch dip.
Simply drape over the mold in all directions until completely covered. If mold begins to fall, use materials to hold the base in place.
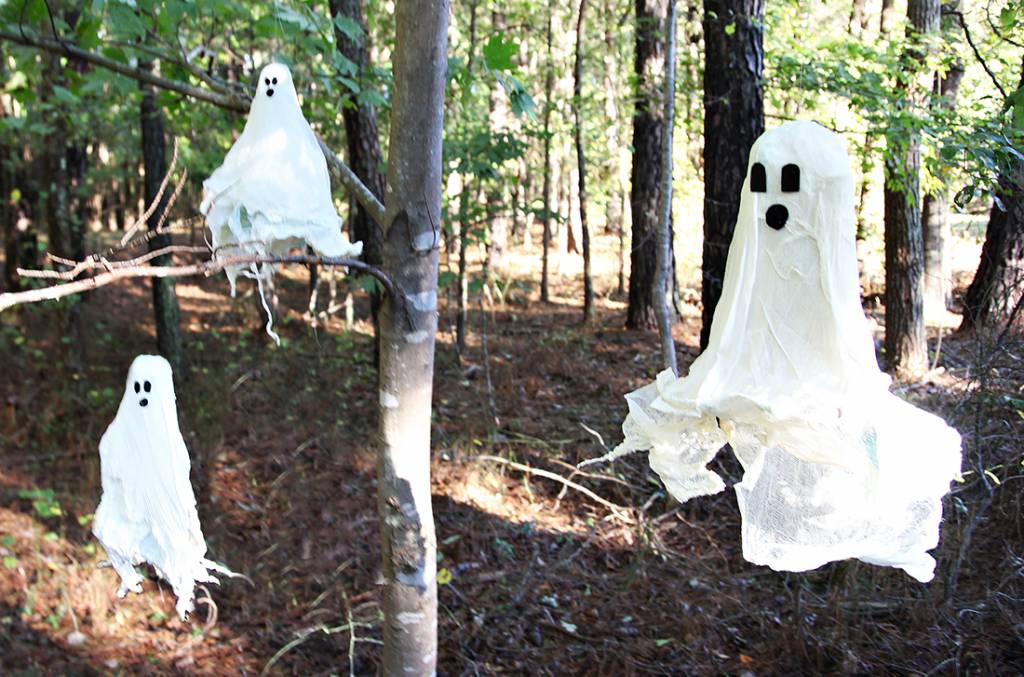
Let the cheesecloth dry overnight. Once dry, remove the cheesecloth ghost off the mold.
Create eyes and/or mouth for your ghost’s face with the black felt. You may want to create a stencil if you are going to make several ghosts. When dry, glue the pieces to create your ghost’s face.
Display your ghost made of cheese cloth, give him a name, and repeat to make him/her some friends!
Need other easy Halloween decorating projects to accompany your cheesecloth ghosts? Here are a few other spooktacular Halloween decor ideas to consider.
Have simple Halloween decorating ideas of your own? Feel free to share your DIY projects below!


Get Social
5 days ago
Video
Share on Facebook Share on Twitter Share on LinkedIn Share by Email
1 week ago
Video
Share on Facebook Share on Twitter Share on LinkedIn Share by Email
2 weeks ago
Video
Share on Facebook Share on Twitter Share on LinkedIn Share by Email
3 weeks ago
Video
Share on Facebook Share on Twitter Share on LinkedIn Share by Email
3 weeks ago
Video
Share on Facebook Share on Twitter Share on LinkedIn Share by Email
Cling Cover is premium plastic sheeting clings to almost any surface, attracting overspray and keeping your workspace clean, bright, and protected.
2#trimaco #totaljobsiteprotection #savetimesavemoney #work #paint #painting #construction #constructionproducts #build #buildzoom
Prepping for renovation with Easy Mask Tape & Drape 🚨🚨
@refreshhomeimprovements
#trimaco #totaljobsiteprotection #savetimesavemoney #work #paint #painting #construction #constructionproducts #build #buildzoom #building #homebuild
Refresh your kitchen on a budget with an easy DIY backsplash ✨
4Check out our latest blog for a step by step guide: https://trimaco.com/blog/how-to-diy-a-kitchen-backsplash/
#trimaco #totaljobsiteprotection #savetimesavemoney #work #paint #painting #construction #constructionproducts #build #buildzoom
Highly absorbent and reusable, Trimaco’s Wonder Rag is your go-to for a spotless finish
2#trimaco #totaljobsiteprotection #savetimesavemoney #work #paint #painting #construction #constructionproducts #build #buildzoom #building #homebuild