
September 10, 2025
The distant cousin to the more common coat of paint, staining is prevalent in home improvement projects, such as furniture refinishing, banisters, stair treads, doors, and more.
Here’s the thing: you want to apply and wipe off the excess stain with a clean cloth wiper before it dries. We understand it is tempting to use a sprayer to cover large surfaces quickly. However, by the time you follow up with a stain wiper, areas will have dried, leaving behind blotches.

Start by sanding the wood surface using medium to fine-grit sandpaper (typically 120–220 grit). This removes imperfections and opens the wood grain for better stain penetration. After sanding, thoroughly clean the surface using a tack cloth to remove all dust and particles. A clean, smooth surface is essential for an even, professional-looking finish.
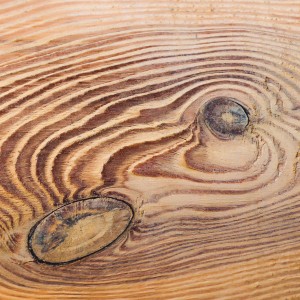
Use an oil-based pre-stain wood conditioner, especially on softwoods like pine or birch. Apply it evenly with a brush or cloth, allowing it to soak in for 5–15 minutes. Do not let it dry completely! Apply the stain within 15 minutes to 2 hours (check your product label). This step helps the wood absorb stain uniformly and reduces streaking or patchiness.
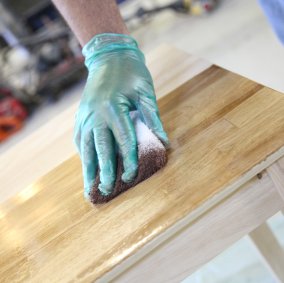
Apply the stain in manageable sections using a brush or lint-free cloth. Immediately wipe off the excess with a clean cloth, following the direction of the wood grain. Take your time! Rushing can lead to uneven color. Use a small brush to reach into corners, grooves, or fluted details to ensure full coverage.
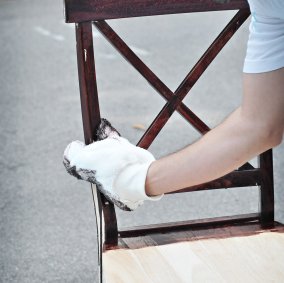
Oil-based stains dry slowly, making them suitable for brushing or spraying over large areas. However, water-based and lacquer stains dry quickly and may leave brush marks. For these, use lint-free cloths to apply and wipe the stain, which helps avoid streaks.
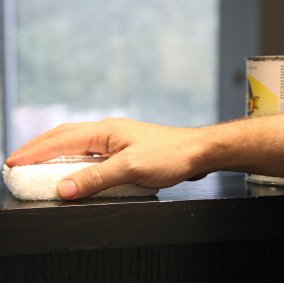
Once the stain has dried and you’re happy with the color, apply a sanding sealer or wood grain filler. This step fills in open pores and helps achieve a smoother final finish. Let the sealer dry completely, then lightly sand with fine-grit sandpaper before moving on to the topcoat.
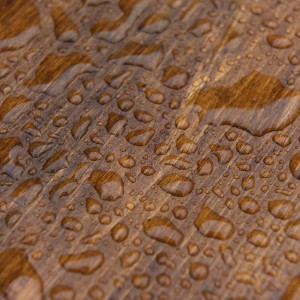
Finish your project with a durable topcoat such as polyurethane, varnish, or lacquer. Choose based on your desired sheen and durability needs. Apply in thin, even coats, allowing each to dry fully before applying the next. Lightly sand between coats if needed for a flawless finish.
When it comes to DIY wood staining, mastering the right techniques can make all the difference. Here are some of the best tips and tricks to ensure your project turns out beautifully:
1. Use a Gel Stain for Beginners: Gel stains are thicker and less likely to drip, making them easier to control for beginners. They also provide a more even finish, which is great for avoiding streaks.
2. Choose the Right Wood Stain Color: When selecting a stain color, consider the existing colors in your room and the type of wood you are working with. Lighter stains can highlight the wood grain, while darker stains can add a rich, dramatic effect.
3. Apply Stain in a Well-Ventilated Area: Proper ventilation is crucial when staining wood to ensure the stain dries evenly and to avoid inhaling fumes. This is especially important for beginners who might be working on their first project.
4. Use a Foam Brush for Detailed Areas: For intricate details and hard-to-reach spots, a foam brush can help you apply the stain more precisely without leaving streaks. This is a useful tip for staining wood without streaks.
5. Practice on Scrap Wood: Before starting your main project, practice your staining technique on a piece of scrap wood. This will help you get a feel for how the stain applies and dries, which is particularly helpful for beginners.
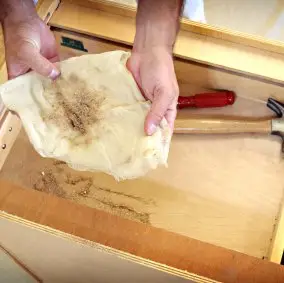
There are a wide range of techniques on how to apply wood stain. Trimaco offers choices for every staining project and budget, including projects with gel stain, water-based stains, and oil stains. Keep these on hand year-round for whatever project comes your way.
Find Our Staining materials & Drop Cloths at a Retailer Near You
Get Social
3 months ago
Video
Share on Facebook Share on Twitter Share on Linked In Share by Email
3 months ago
Video
Share on Facebook Share on Twitter Share on Linked In Share by Email
3 months ago
Photo
Share on Facebook Share on Twitter Share on Linked In Share by Email
3 months ago
Video
Share on Facebook Share on Twitter Share on Linked In Share by Email
4 months ago
Video
Share on Facebook Share on Twitter Share on Linked In Share by Email
Cling Cover is premium plastic sheeting clings to almost any surface, attracting overspray and keeping your workspace clean, bright, and protected.
2#trimaco #totaljobsiteprotection #savetimesavemoney #work #paint #painting #construction #constructionproducts #build #buildzoom
Prepping for renovation with Easy Mask Tape & Drape 🚨🚨
@refreshhomeimprovements
#trimaco #totaljobsiteprotection #savetimesavemoney #work #paint #painting #construction #constructionproducts #build #buildzoom #building #homebuild
Refresh your kitchen on a budget with an easy DIY backsplash ✨
4Check out our latest blog for a step by step guide: https://trimaco.com/blog/how-to-diy-a-kitchen-backsplash/
#trimaco #totaljobsiteprotection #savetimesavemoney #work #paint #painting #construction #constructionproducts #build #buildzoom
Highly absorbent and reusable, Trimaco’s Wonder Rag is your go-to for a spotless finish
2#trimaco #totaljobsiteprotection #savetimesavemoney #work #paint #painting #construction #constructionproducts #build #buildzoom #building #homebuild