March 12, 2026
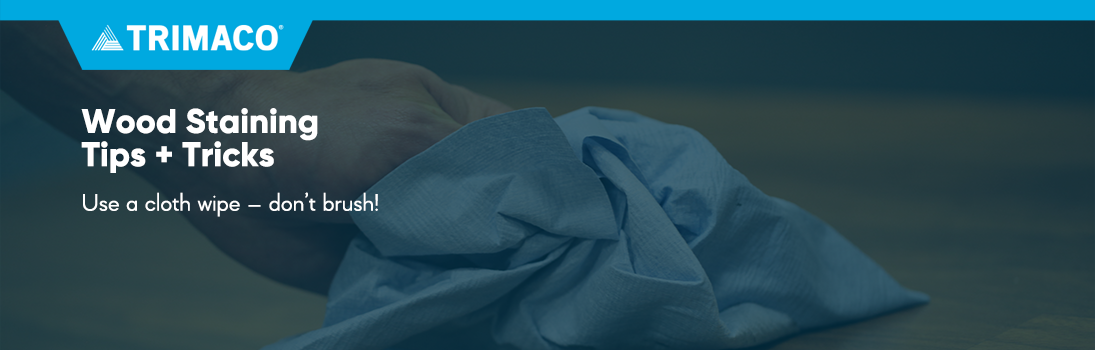
Staining wood looks simple, but it can go wrong fast. Maybe you’ve seen streaks, dark patches, or uneven color. In most cases, the problem isn’t the stain itself. It’s how the stain was applied. Our staining tips make it clear: applying the stain and wiping it at the right time are the keys to a smooth, even finish.
This guide explains when to wipe, when to brush, and when to do both. We’ll also show you which Trimaco tools help you get professional results every time.
Stain works differently from paint. Paint sits on top of the surface, but stain needs to go into the surface. That’s why the way you apply and wipe stain affects the final look so much.
We recommend taking things slow, and apply stain in small sections and wipe off the extra off before it dries. This prevents blotches and keeps the color even. Your results depend on a few things:
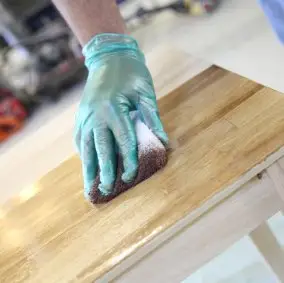
A brush is helpful when you’re working on corners, grooves, trim, or carved details. It helps push stain deep into areas a cloth can’t reach. Even so, We recommend wiping with a clean cloth afterward for a uniform finish.
A brush has it’s place and time when staining, but that doesn’t mean it doesn’t have it’s challenges.
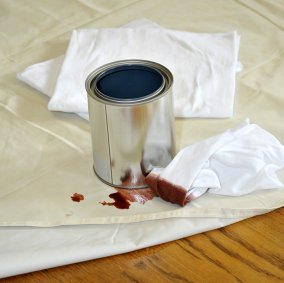
Using a lint‑free cloth or wiper is one of the easiest ways to get even color on big, flat surfaces. You can control how much stain stays on the wood, and it’s simple to blend sections together.
A cloth has several advantages when you’re staining wood. It helps you get an even color because wiping removes extra stain, preventing the surface from looking too dark or patchy. Cloths also move naturally with the grain, so you won’t end up with brush marks or streaks. And with Trimaco’s low‑lint, durable wipers, you can work faster without leaving behind loose fibers on the surface.
A cloth does have a few limitations when you’re staining wood. It can be hard to reach tight corners or deep grooves because cloths can’t get into detailed areas the way a brush can, so you may need to use both tools together. Cloths also absorb stain quickly, which means you’ll go through several during a project, so it’s smart to have extras ready before you begin.
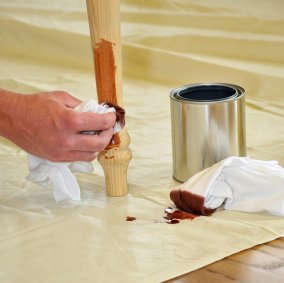
Using both a brush and a cloth together often gives you the best results when staining wood. A brush helps you reach corners, grooves, and detailed areas, making sure the stain covers every part of the surface. After brushing, wiping the larger, flat areas with a clean cloth evens out the color and removes extra stain before it dries. we recommend using both a brush and wiper when staining wood for a smooth, consistent finish.
| STAIN TYPE | Best Tool | Why? |
|---|---|---|
| Oil‑based stain | Cloth + small detail brush | Good working time; wiping gives smooth, rich color |
| Water‑based stain | Wipers or cloths in small sections | Dries fast, so wiping quickly keeps the color even |
| Gel stain | Cloth for leveling, brush for corners | Thick stain needs wiping to avoid smudges |
Yes! We recommend applying stain and then wiping off the extra before it dries.
It depends on how much you wipe off. Wiping removes extra stain so you’re left with the right amount. Low‑lint wipers help you do this efficiently.
Use lint‑free, absorbent cloths like Trimaco’s ProPerfect® Premium Painter’s Rags or One Tuff® Wipers. For dust control, use SuperTuff® Tack Cloth.
Sand → remove dust → apply stain → wipe excess → let dry → repeat if needed. Using a tack cloth helps keep dust off between steps.
Stain‑soaked rags can be hazardous. Store and throw them away according to local safety rules.


Get Social
2 weeks ago
Video
Share on Facebook Share on Twitter Share on Linked In Share by Email
2 weeks ago
Video
Share on Facebook Share on Twitter Share on Linked In Share by Email
3 weeks ago
Video
Share on Facebook Share on Twitter Share on Linked In Share by Email
4 weeks ago
Video
Share on Facebook Share on Twitter Share on Linked In Share by Email
4 weeks ago
Video
Share on Facebook Share on Twitter Share on Linked In Share by Email
Cling Cover is premium plastic sheeting clings to almost any surface, attracting overspray and keeping your workspace clean, bright, and protected.
2#trimaco #totaljobsiteprotection #savetimesavemoney #work #paint #painting #construction #constructionproducts #build #buildzoom
Prepping for renovation with Easy Mask Tape & Drape 🚨🚨
@refreshhomeimprovements
#trimaco #totaljobsiteprotection #savetimesavemoney #work #paint #painting #construction #constructionproducts #build #buildzoom #building #homebuild
Refresh your kitchen on a budget with an easy DIY backsplash ✨
4Check out our latest blog for a step by step guide: https://trimaco.com/blog/how-to-diy-a-kitchen-backsplash/
#trimaco #totaljobsiteprotection #savetimesavemoney #work #paint #painting #construction #constructionproducts #build #buildzoom
Highly absorbent and reusable, Trimaco’s Wonder Rag is your go-to for a spotless finish
2#trimaco #totaljobsiteprotection #savetimesavemoney #work #paint #painting #construction #constructionproducts #build #buildzoom #building #homebuild